Making of Silver Mountain Condominiums Rendering with Adobe Photoshop
February 7, 2013
In this step by step progression I documented my workflow of this winter scene using Adobe Photoshop over SketchUp screen capture.
 1. This is the screen capture from the SketchUp model. Most of the time I would create base render by importing the model into 3d rendering program like 3ds Max but in this tutorial I wanted to show you that you can also choose to do all of your work in Adobe Photoshop.
 2. I selected the red vertical siding, filled it with color and dropped the opacity by 10 percent. The vertical joint lines are done with the line tool.
I am starting to add stone textures and adjust the perspective of those textures with transform tool.
2. I selected the red vertical siding, filled it with color and dropped the opacity by 10 percent. The vertical joint lines are done with the line tool.
I am starting to add stone textures and adjust the perspective of those textures with transform tool.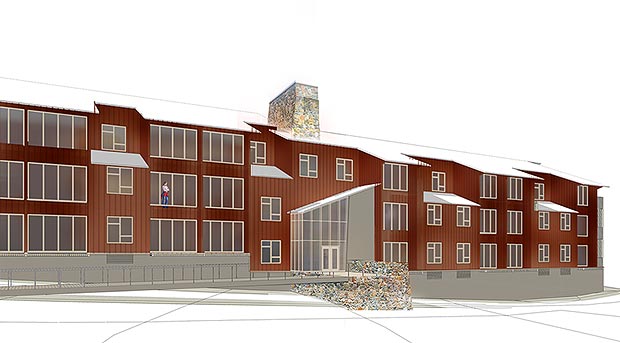 3. All window mullions are done with the line tool - off white, warm hues. I dropped the opacity of the mullions about 10 percent to get the red hues of siding to show through to get a better blend.
The window glass is selected and filled with color - dark , blue hue. I dropped the opacity of the windows by about 20 percent to again let some of the red hues of the siding to show through adding depth and richness to the glass color.
3. All window mullions are done with the line tool - off white, warm hues. I dropped the opacity of the mullions about 10 percent to get the red hues of siding to show through to get a better blend.
The window glass is selected and filled with color - dark , blue hue. I dropped the opacity of the windows by about 20 percent to again let some of the red hues of the siding to show through adding depth and richness to the glass color.
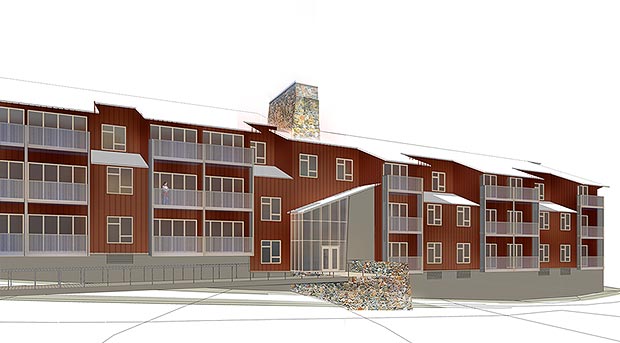 4. Balconies are done with the line tool. I always try to make sure that I take advantage of any repetitive elements so when
I do the balconies I do them in elevation and copy/paste anthing that repeats. When I finish one vertical set of balconies I place them in my rendering and using transform tool I adjust the perspective.
4. Balconies are done with the line tool. I always try to make sure that I take advantage of any repetitive elements so when
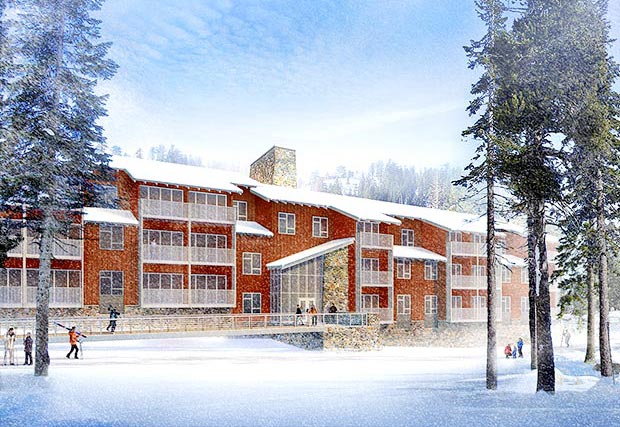
I do the balconies I do them in elevation and copy/paste anthing that repeats. When I finish one vertical set of balconies I place them in my rendering and using transform tool I adjust the perspective. 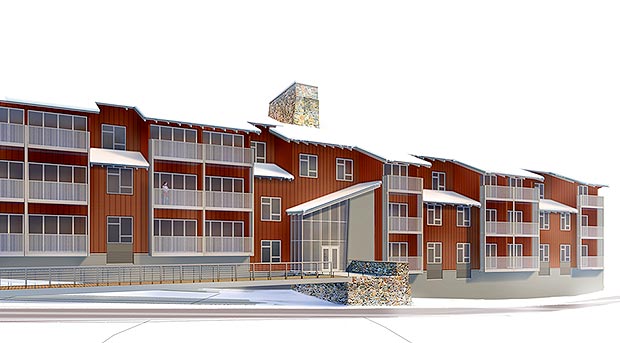 5. Next I add snow to the roofs and the ground. I select the areas of snow, fill with white and add guassian blur filter to soften the edges. Now I add shadows with the selection tool, fill them with blue hues and put the layer on multiply blending mode. Make sure to apply small amount of guassian blur to your shadows. This is especially important on the rooftops where the thick blanket of snow has visible rounded edges. The blue/purple hues of the shadows will add richness to the color of the building and make our snow look more convincing.
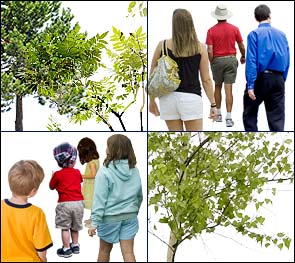
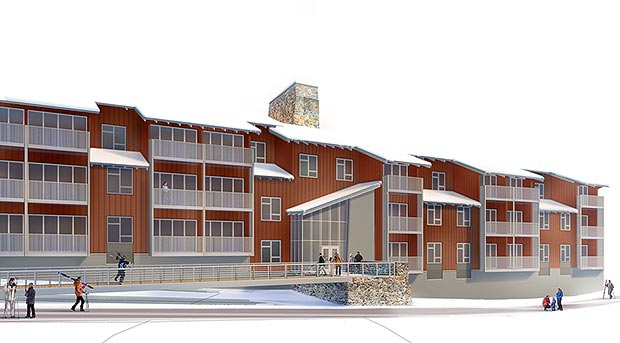 6. Now I add people. Make sure to add ground shadows to anchor the figures to the ground.
  7. Here is the screen shot of my background stiched together from three photos.
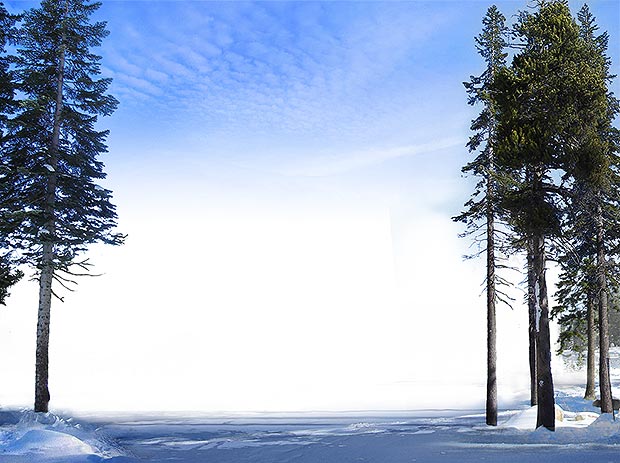
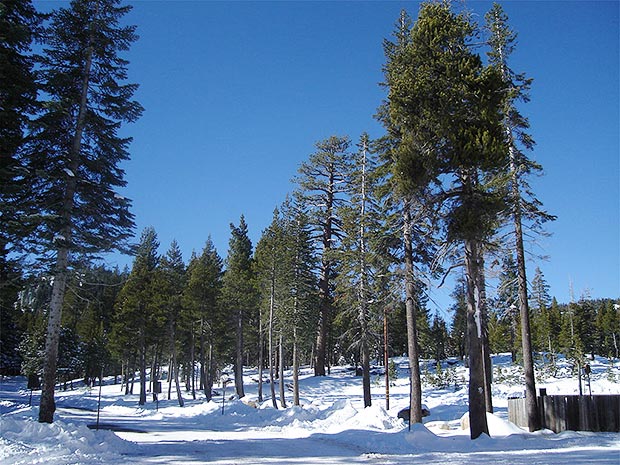 8. Here is the photo of the foreground. I am using channels to extract the trees from the blue background.
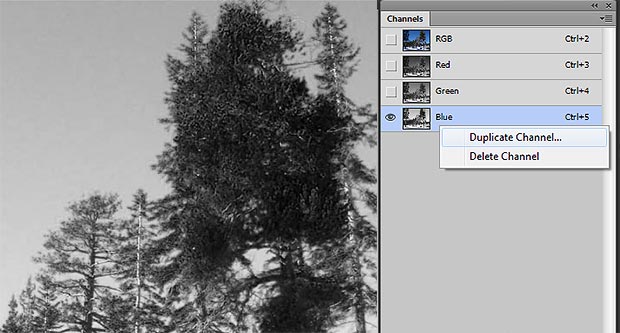 9. Here is how I extracted the trees. First in your channels pallet select the blue channel and duplicate the channel.
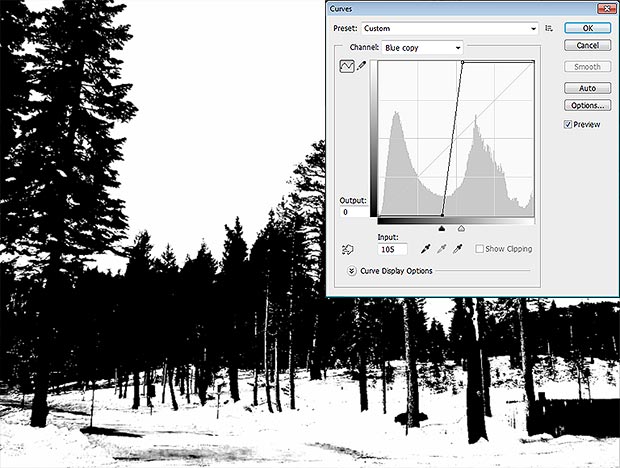 10 Working on a duplicate of the blue channel apply curves. Image - Adjustments - Curves or Ctrl M on PC.
On your curves graph you will create two points and place them like I did in the image above. The placement of the points will vary depending on your photo but the important thing is that one point is on the very top and another on the bottom of the graph. This is something you have to experiment with but once you start moving the points on the curve you will quickly figure out how it all works.
10 Working on a duplicate of the blue channel apply curves. Image - Adjustments - Curves or Ctrl M on PC.
On your curves graph you will create two points and place them like I did in the image above. The placement of the points will vary depending on your photo but the important thing is that one point is on the very top and another on the bottom of the graph. This is something you have to experiment with but once you start moving the points on the curve you will quickly figure out how it all works.
 11. This is the end result of the foreground with added sky. The sky texture layer is on a layer that is set to multiply blending mode so the trees are picking up some of those blue hues at the top. The trees didn't extract perfectly so I had to do some manual cleanup adding back the bright areas on the tree trunks. Also noticed that I used some of the foreground snow from the photo. The forground tree shadow was added using the tree on the left. I created selection with the extracted photo of the tree. I filled the selection with blue hues and positioned the shadow flat on the ground with transform tool. Finally I put the layer with the tree shadow on multiply blending.
 I had a little fun with this one and added some snow. There are a lot of free tutorials on the web on how to make snow in Photoshop so I will not go in to that as part of this tutorial.